

Step-by-Step Guide: Installing Sitecore Experience Manager 10.2 for Seamless Digital Experiences

Here explain How easy to install Sitecore Experience Manager 10.2
Prerequisites:
- IIS
- MS SQL
- .Net Framework (ASP.NET 3.5 and ASP.NET 4.8)
- Complete all pending Windows updates
- Valid Sitecore CMS License file
Steps:
1.Download Sitecore setup (from https://dev.sitecore.net/Downloads/Sitecore_Experience_Platform/102/Sitecore_Experience_Platform_102.aspx)
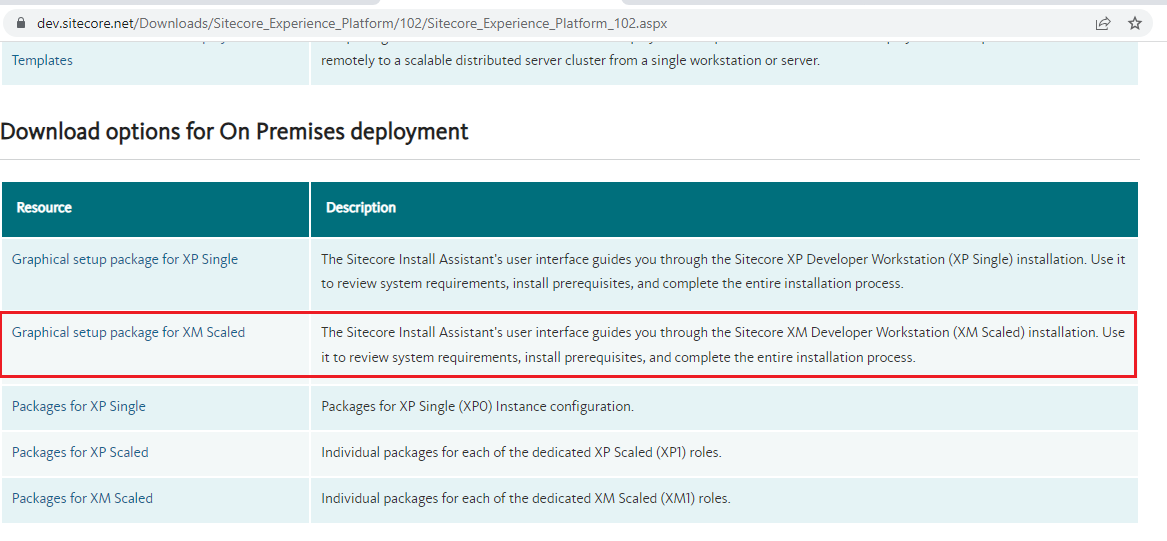
Download Graphical setup package for XM and unzip downloaded file after successful download
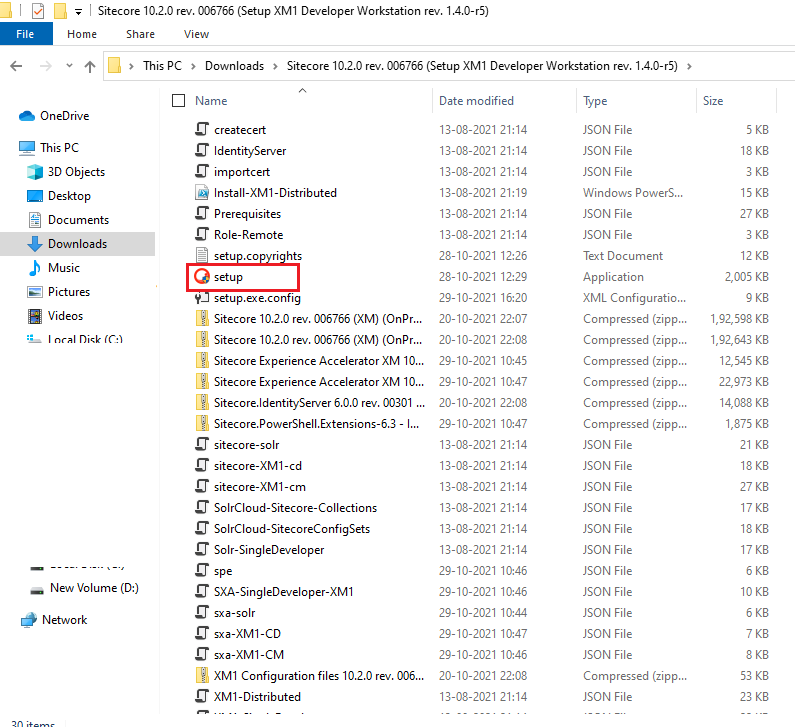
2. Run setup.exe
i.Starting installation with Sitecore Install Assistance (SIA)
.png)
Click Start button
ii. Show Sitecore Prerequisites window to install prerequisites
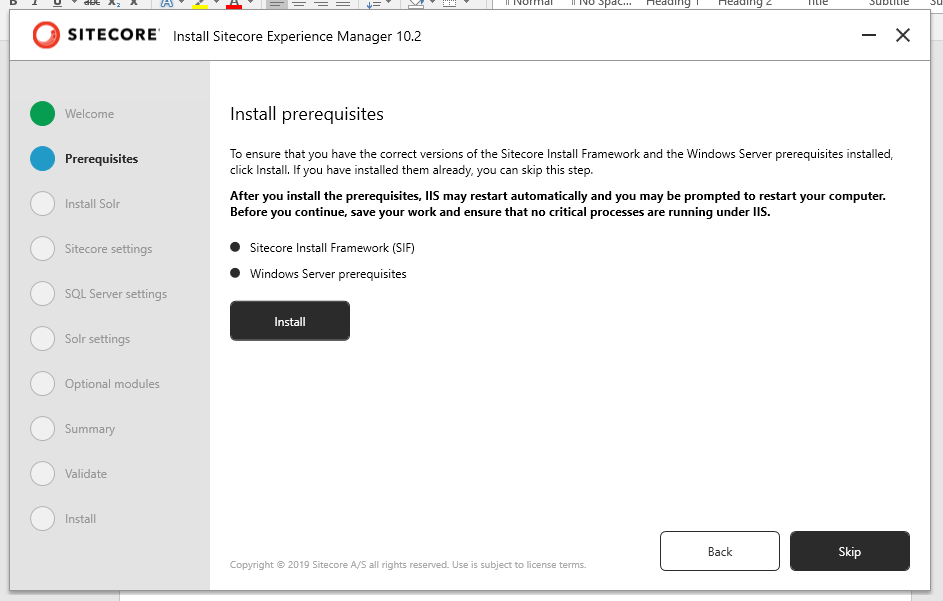
Click install button for download and install all required prerequisites. If it completed successfully then you can see the following –
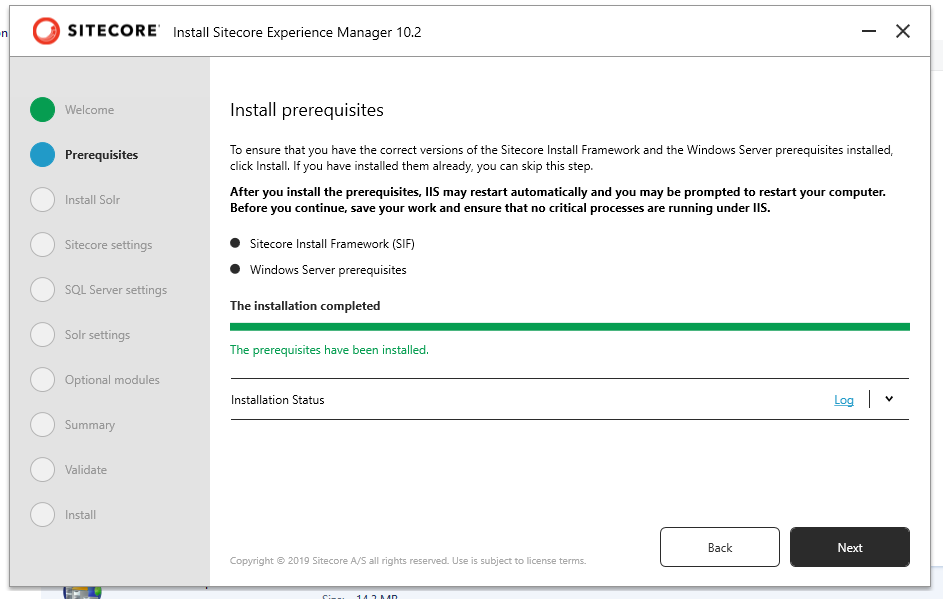
Click on Next button to continue installation.
iii. Install Solr search service
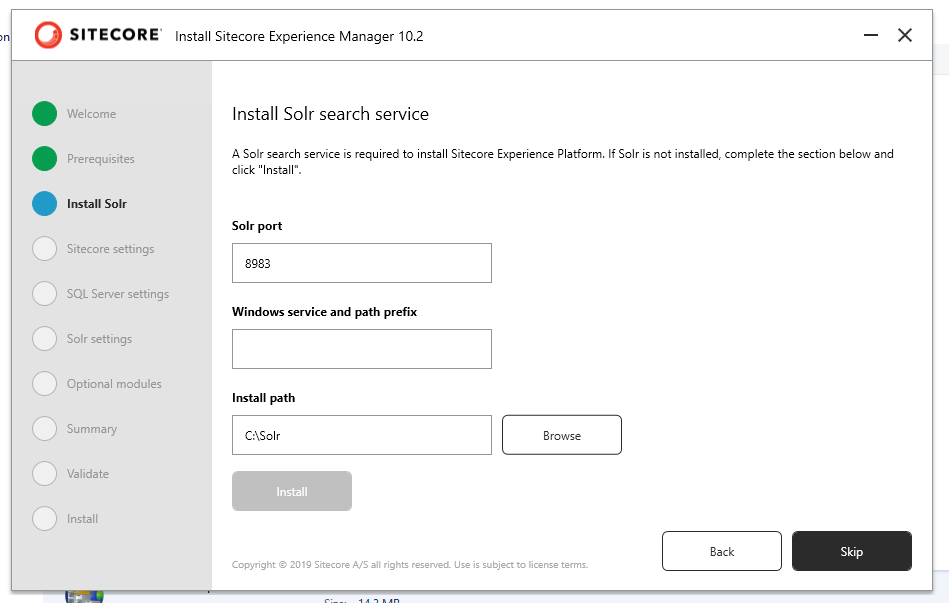
Solr search is a powerful and scalable search engine that can be used to index and search Sitecore content. It is default search engine for on-premise installation of Sitecore.
You should provide the following while configure Solr search service –
- Solr Port: 8983 (default)
- Windows service and path prefix: Desired prefix
- Install Path: desired location from your machine (ex: C:\Solr)
- Click install Button
You can see the following after successful solr service configured –
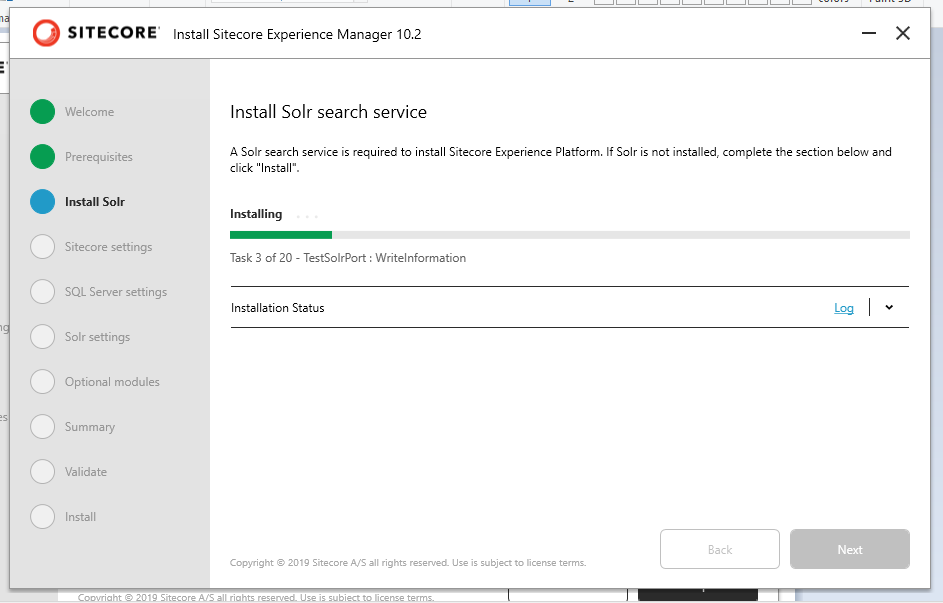
and Next button to continue installation.
iv. Configure Sitecore Instance
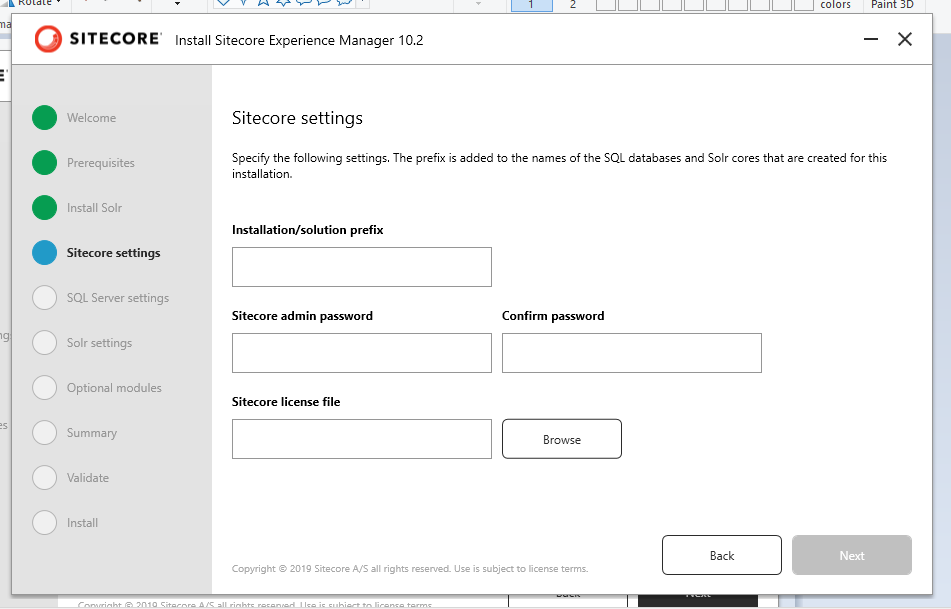
This is for configure Sitecore instance and specify the following –
- Installation/Solution prefix: it is your Sitecore instance name (ex: sc102xm)
- Sitecore admin password: enter your desired password
- Confirm password: enter your desired confirm password
- Sitecore license file: Browse Sitecore valid license from your machine
- Click Next button to continue the installation
V.Configure MS SQL connection

Specify here Microsoft SQL server details like Server name, Admin user and password to create Sitecore databases and Click Next button to continue installation.
vi. Solr Settings
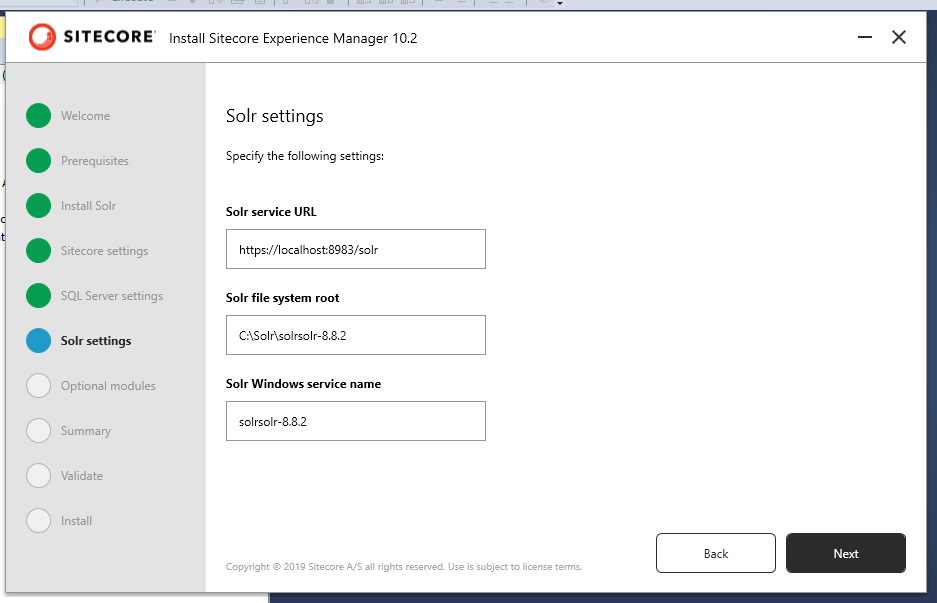
Solr settings values loads default based on previous installation. Please validate before click on Next button like
- Browse the Solr service URL
- Check Solr file system root exist or not
- Solr Windows service name available on services or not
vii. Sitecore Module (SXA – Optional)
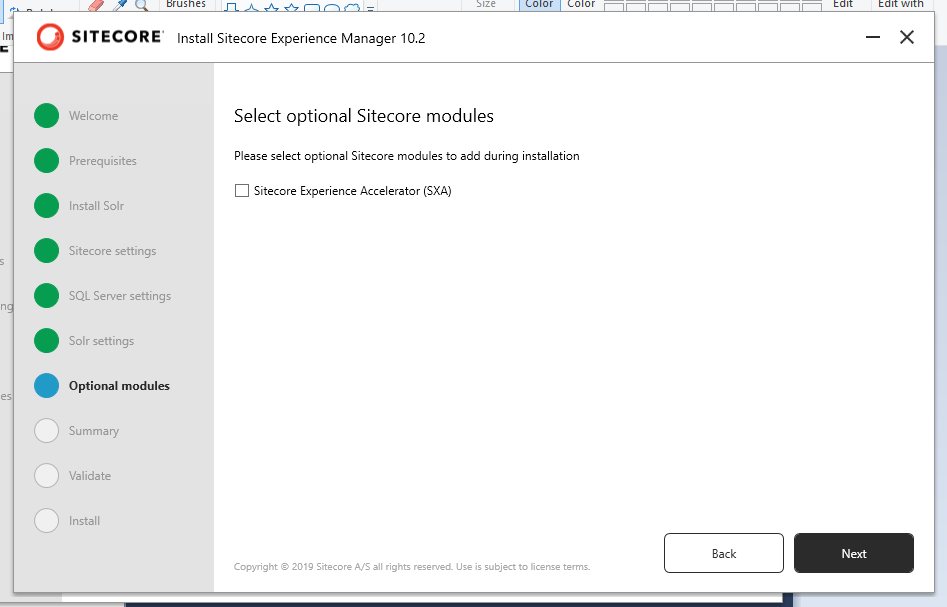
This is optional and Click Next button to continue installation.
viii. Summary
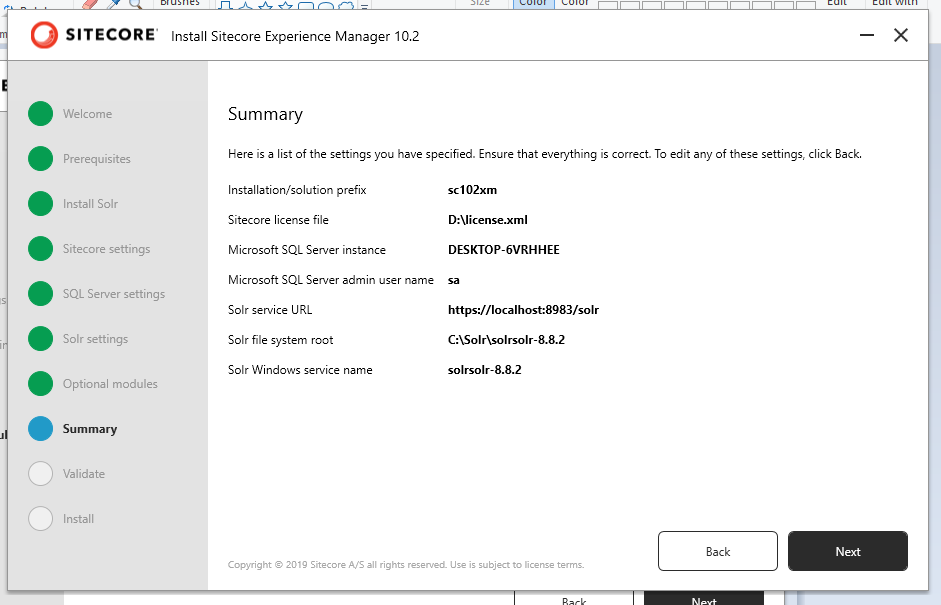
Summary display like Sitecore instance name, license file location, MS SQL Server name, admin user name, Solr service URL, Solr file system root and Solr windows service name.
Click Next button to continue installation.
ix. Validate
All requirement values are valid from previous steps then show the following with status
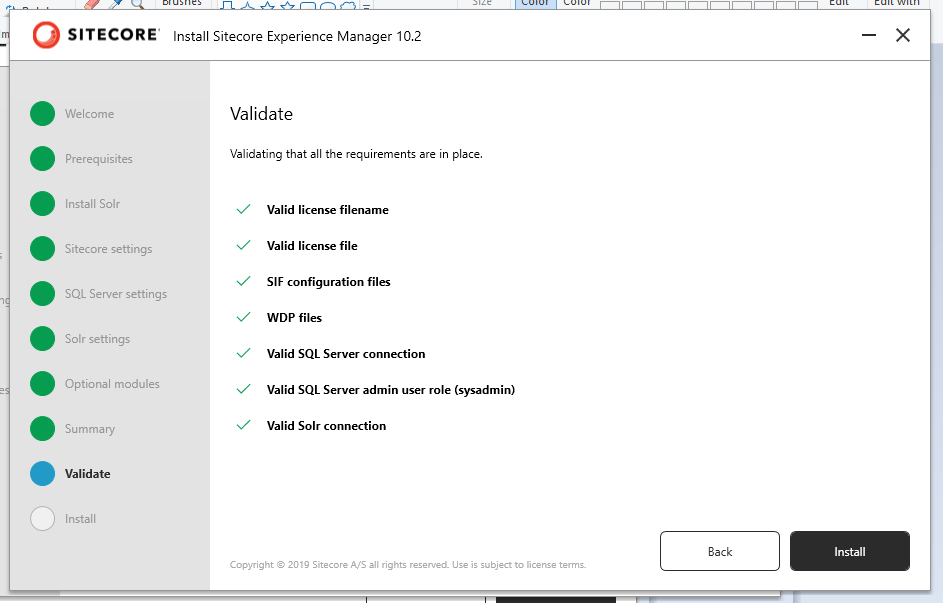
Everything good then click on Install button to start installation process.
x. Start …. Installation process

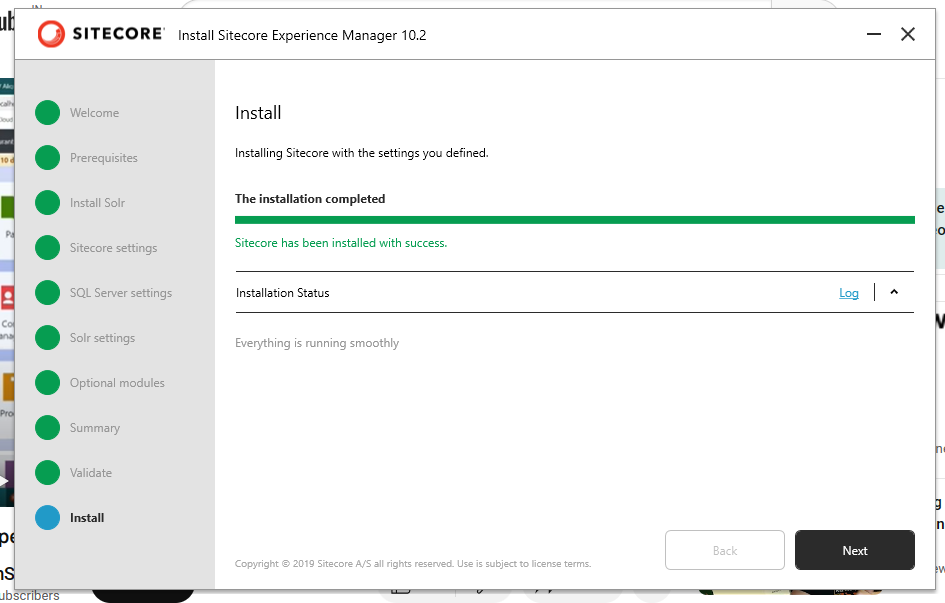
xi. Completed
Once successfully completed installation then you can see the following
Now Sitecore instance is created successfully in your machine and Click Next button to complete installation. You can see the following
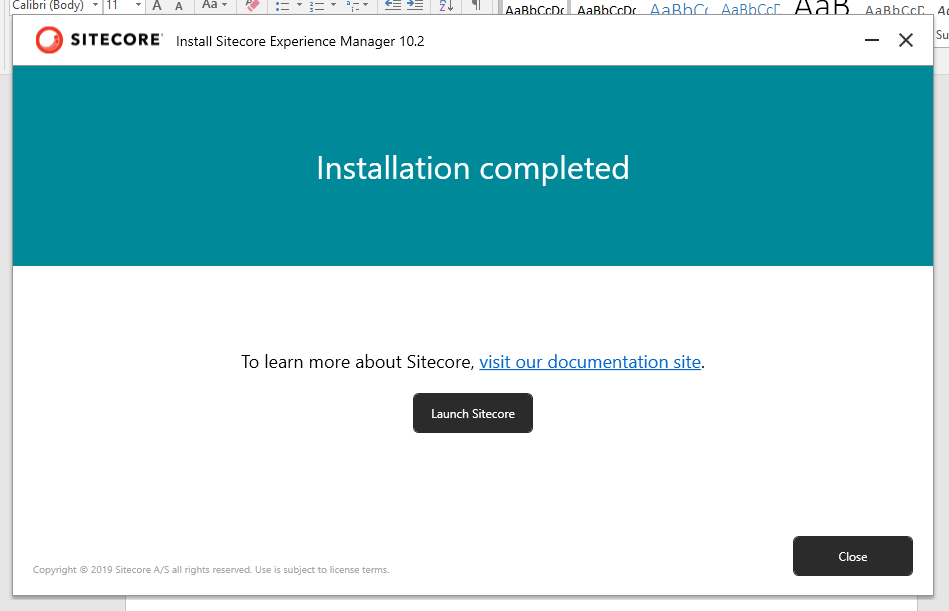
Click on Launch Sitecore button to open Sitecore CMS admin site on browser.
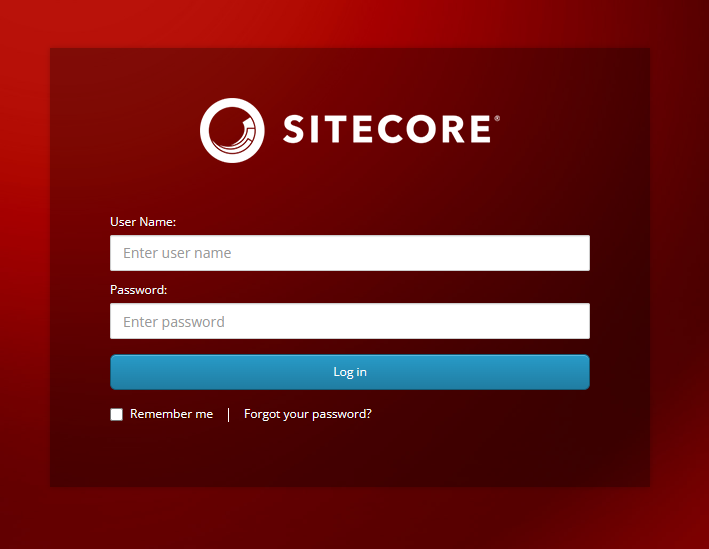
You can login with specified password while installation on Sitecore settings step. Default User name is admin
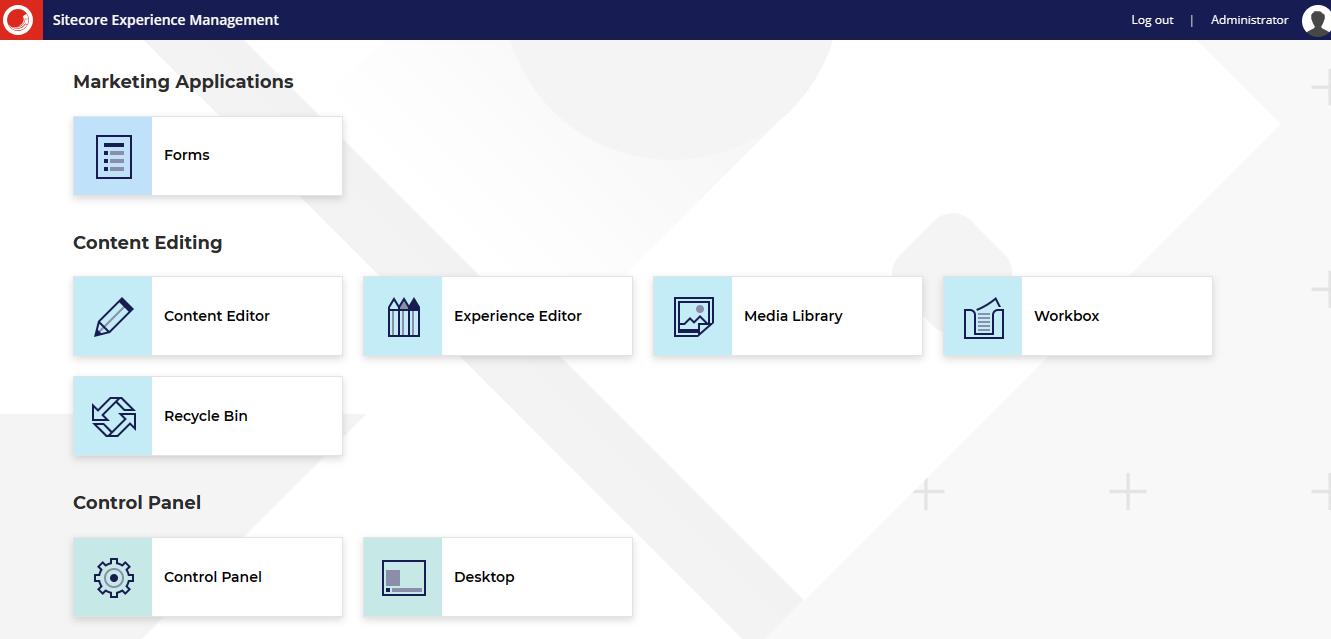
You can Sitecore CMS Dashboard like below
You can see installed Sitecore website like below –